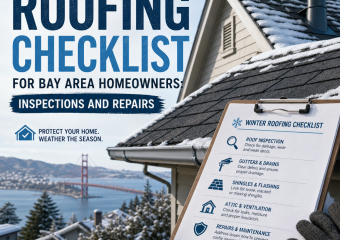


Ultimate Bay Area Roof Inspection Checklist for 2026
The Ultimate Bay Area Roof Inspection Checklist for 2026
A roof in the Bay Area faces a unique mix of challenges. Coastal salt air, winter rain, summer heat, fog, wind, and wildfire smoke can all take a toll over time. That’s why a regular, thorough inspection matters so much in 2026. Whether your home is in San Francisco, Oakland, San Jose, or a nearby neighborhood, this Bay Area roof inspection checklist can help you spot issues early and protect your property before small problems turn into expensive repairs.
Why roof inspections matter in the Bay Area
Local weather patterns can be tough on roofing materials. Moisture encourages moss and algae growth. Wind can loosen shingles or tiles. UV exposure can dry out seals and flashing. Even if your roof looks fine from the ground, hidden damage may already be forming.
A detailed inspection helps you:
- Catch leaks before they spread
- Extend roof lifespan
- Protect insulation and attic space
- Avoid emergency repairs during storm season
- Preserve home value
Bay Area roof inspection checklist: exterior
Start with the roof surface and work your way down. If the roof is steep or difficult to access, hire a licensed roofing professional instead of climbing up yourself.
1. Check shingles, tiles, or panels
Look for:
- Cracked, curled, or missing shingles
- Broken or slipped tiles
- Rusted or lifted metal panels
- Warping, blistering, or sagging sections
Even one damaged section can allow water to enter the roof system.
2. Inspect flashing around penetrations
Flashing seals areas where the roof meets another surface, such as:
- Chimneys
- Skylights
- Vents
- Dormers
- Valleys
Watch for loose edges, gaps, corrosion, or dried sealant. Flashing failures are among the most common causes of roof leaks in Bay Area homes.
3. Look for moss, algae, and debris buildup
Foggy and damp conditions make the Bay Area especially prone to organic growth on roofs. Moss may trap moisture and damage shingles or tiles over time.
Clear away:
- Leaves
- Branches
- Pine needles
- Dirt buildup
- Moss and algae growth
Pay special attention to shaded areas and roof valleys where debris collects.
4. Examine gutters and downspouts
Your roof and drainage system work together. If gutters are clogged, water can back up under the roofing material or spill near the foundation.
Check for:
- Blockages
- Sagging gutters
- Loose fasteners
- Rust spots
- Water stains near fascia boards
Make sure downspouts direct water away from the home.
5. Review roof edges and eaves
Roof edges often reveal early warning signs of trouble. Look for:
- Rotting wood
- Peeling paint
- Water stains
- Animal entry points
- Damaged drip edge
These areas are vulnerable to wind and moisture, especially in older Bay Area homes.
Bay Area roof inspection checklist: interior
The attic and ceilings can reveal leaks long before they become visible outside.
6. Inspect the attic for moisture
Go into the attic during daylight if possible. Look for:
- Wet insulation
- Mold or mildew odors
- Dark water stains
- Damp rafters or sheathing
- Daylight coming through roof boards
Any moisture in the attic should be addressed quickly to prevent structural damage.
7. Check ventilation
Good ventilation helps regulate heat and moisture. Poor airflow can shorten roof life and increase energy costs.
Make sure:
- Intake and exhaust vents are not blocked
- Insulation is not covering vents
- Air flows freely through the attic
- Fans or mechanical vents are working properly
This is especially important in 2026 as more homeowners focus on energy efficiency and indoor comfort.
8. Look at ceilings and upper walls inside the home
Water intrusion often appears indoors first as subtle discoloration. Check for:
- Yellow or brown stains
- Bubbling paint
- Soft drywall
- Peeling texture
- New cracks near ceiling lines
These signs may indicate a slow leak that has been active for weeks or months.
Bay Area roof inspection checklist: maintenance details
A roof inspection is also a good time to evaluate small maintenance items that affect long-term performance.
9. Assess sealants and caulking
Sealants around vents, flashing, and roof transitions can dry out and fail. Look for:
- Cracks
- Shrinkage
- Separation
- Brittle texture
Re-sealing problem spots early can prevent more costly water damage later.
10. Check for pests and animal damage
Birds, raccoons, squirrels, and insects can all damage roofing materials or open paths into the attic.
Watch for:
- Chewed wood
- Nesting materials
- Holes near roof edges
- Droppings in the attic
- Disturbed insulation
11. Review roof age and previous repairs
A roof’s condition depends not just on what you can see, but also on its history. If your roof is nearing the end of its expected lifespan, even minor issues may signal a bigger replacement decision ahead.
Keep track of:
- Roof installation date
- Past repairs
- Warranty information
- Material type
- Known leak locations
When to schedule a professional inspection
Some inspections can be done from the ground or inside the attic, but a professional evaluation is often the safest choice. Schedule one:
- Before and after the rainy season
- After strong winds or storms
- If you notice stains or leaks
- When buying or selling a home
- If your roof is 15 years old or older
In the Bay Area, annual inspections are a smart minimum. Homes in coastal or heavily tree-covered areas may need more frequent checks.
Final thoughts
The Bay Area roof inspection checklist for 2026 is all about prevention. A few careful inspections each year can help you spot damage early, improve drainage, and protect your home from the region’s changing weather conditions. By checking both the outside and inside of your roof system, you give yourself the best chance to avoid surprise repairs and keep your home safe, dry, and efficient.